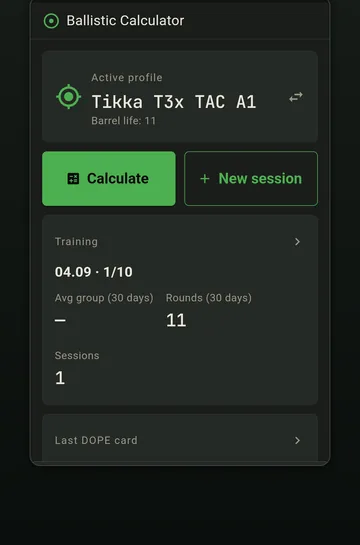
The app opens on a dashboard rather than a calculator, because a calculator with no rifle behind it cannot tell you anything specific. This guide walks the shortest honest path to a solution that describes your rifle.
1. Language and units
Open Settings first. Two choices here shape everything you will type afterwards.
- Language — twelve are available, and the whole interface including the DOPE card follows the setting.
- Unit system — metric or imperial. This governs distance, bullet weight and scope height throughout.
- Angular unit — MIL, MOA or clicks for the output. Match this to your scope, not to your preference.
2. One rifle profile
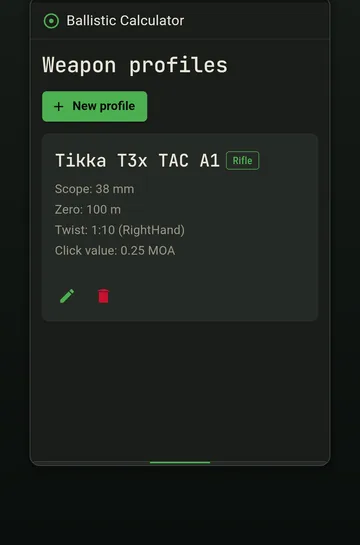
Go to Weapon profiles and add one. Five fields matter, and four of them you can measure in the next few minutes:
| Field | What to enter | How to get it |
|---|---|---|
| Zero distance | The distance you actually confirmed at | Your range, in the units you measured |
| Scope height | Bore centreline to scope centreline | Caliper and arithmetic — see the guide |
| Twist rate | e.g. 1:10 | Barrel marking or manufacturer spec |
| Twist direction | Right or left hand | Almost always right; check if unsure |
| Click value | What one turret click moves | The turret cap, or the manual |
The detailed version, including how to measure scope height properly, is in building a rifle profile.
3. A load to go with it
Open Ammo database and search for what you actually shoot — by manufacturer, calibre or bullet weight. Selecting a load brings its ballistic coefficient, its drag model and a nominal muzzle velocity with it.
If you handload, or your load is not listed, use Handloads to create your own entry. The fields are the same; you supply the numbers.
Whichever route you take, the muzzle velocity that arrives with a catalogue load is a test-barrel figure. Replace it with your own the moment you have chronographed the load — this is the single highest-value correction you can make.
4. Your first solution
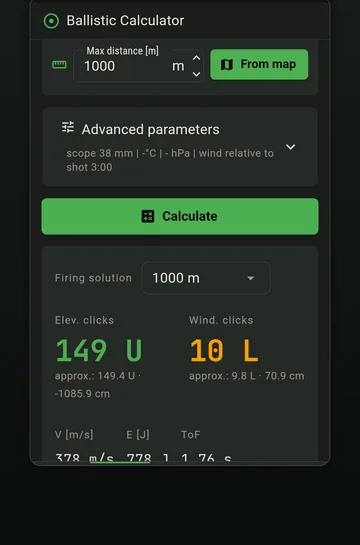
- Open the calculatorYour rifle and load are already selected if you set them as defaults.
- Enter the distanceType it, or bring it from the map tool or the reticle-ranging tool.
- Enter conditionsTemperature and station pressure matter most. Fetch them if you have a signal, type them if you do not.
- Enter the windSpeed, and the clock position it is coming from. Twelve is a headwind, three is from your right.
- Read elevation and windageIn your chosen unit, with the reticle view showing where that lands on your crosshair.
5. What to do next
At this point the app knows your rifle geometry but is still using a catalogue velocity and a published coefficient. Two things turn that into trustworthy data:
- Confirm the zero with five rounds, and make sure the profile's zero distance matches what you shot.
- Confirm at distance with the DOPE ladder, then correct the inputs using truing.
Until you have done those, treat the output as a good starting estimate rather than confirmed data. That is not a limitation of the software — it is true of every solver ever written.
Things worth knowing on day one
- It works offline. The solver, the database and your profiles are on the phone. Only the weather lookup needs a signal.
- There is no account. Nothing to sign up for, nothing to sync, nothing to lose access to.
- Everything is free. There is no paid tier and no in-app purchase; a single banner ad funds it.
- Your data stays local. Profiles, loads and sessions live in the app's own storage. Android's backup can copy them to your Drive if you leave backup enabled.
Frequently asked
Do I need to create an account? +
No. There is no account, no login and no cloud sync. Everything is stored on the device.
Can I use it without a signal? +
Yes. The solver, the ammunition database and your profiles are all local. The optional weather lookup is the only feature that needs a connection.
What if my rifle is not a rifle? +
The solver is a point-mass model and works for any projectile you can describe — pistol loads included. The database carries pistol calibres alongside rifle ones.